總網頁瀏覽量

關於我自己

我的相片
人生的必修課是接受無常,人生的選修課是放下執著。
顯示具有 GIT 標籤的文章。 顯示所有文章

2014年2月12日 星期三

【Git】在 Dropbox 上建立 Git Server 共同開發 by PC_Linux_64bit

【Step1】註冊Dropbox

➊ 連結到官方網站如果要調整頁面語系,就點選


➋ 選擇語系

輸入「姓氏」、「名字」、「電子郵件」和「密碼」

資料輸入完成,勾選「我同意Dropbox條款」,點選「建立帳戶」。

【Step2】連結到官方網站下載Dropbox/或用指令下載

➊ 開啟終端機

➋ 安裝Dropbox
    $cd ~ && wget -O - "https://www.dropbox.com/download?plat=lnx.x86_64" | tar xzf -

➌ 從新建立的.dropbox-dist資料夾執行Dropbox
    $~/.dropbox-dist/dropboxd

➍ 接著一連串「下一頁」

➎ Dropbox上的所有資料夾、檔案都同步到電腦資料夾「Dropbox」中

➏ 登入自己的帳號

➐  Dropbox上的所有資料夾、檔案已經同步到電腦了

修改資料夾權限為可讀可寫可執行
    $chmod 777 ~/Dropbox/

往後若重開機,需要再執行Dropbox以同步
  $~/.dropbox-dist/dropboxd


【Step3】安裝Git

 ➊ 開啟終端機,輸入

$sudo apt-get install git git-core


【Step4】於server端建立.git


➊ 在local端的「Dropbox」資料夾新增一個資料夾(ex:git/repository.git)當做respository 專案,-p用於一次建立多層目錄

$ mkdir -p ~/Dropbox/git/repository.git

➋ 進入該資料夾

$ cd ~/Dropbox/git/repository.git

➌ 將 git/repository.git初始化為git repository,即是git server端的資料。

$ git --bare init


【Step5】於client端建立.git啟用server的.git

➊ $mkdir ~/git/repository.git

➋ $cd ~git/repository.git

➌ $git init

➍ 將Android Project copy到此資料夾

➎ commit

$ git add .

$ git commit -m "initial version"

➏ push

$ git remote add origin ~/Dropbox/git/repository.git

$ git push origin master


【Step6】取得source code

➊ $mkdir ~/git/repository

➋ $cd ~git/repository

➌ $git init

➍ $ git clone ~/Dropbox/git/repository.git


【Step7】共同開發

➊ 將repository.git目錄分享給其他開發者


➋ 諸開發者加入後,其環境仍需完成

【Step1】註冊Dropbox

【Step2】連結到官方網站下載Dropbox

【Step3】安裝Git

【Step6】取得source code

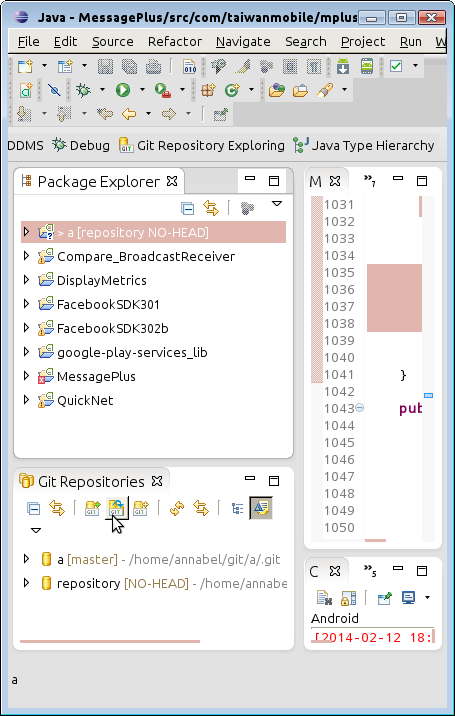
➌ 開啟Eclipse > Window > Show View > Other... > Git > Git Repositories


➍ 選「Clone a Git Repository and add the clone to this view」


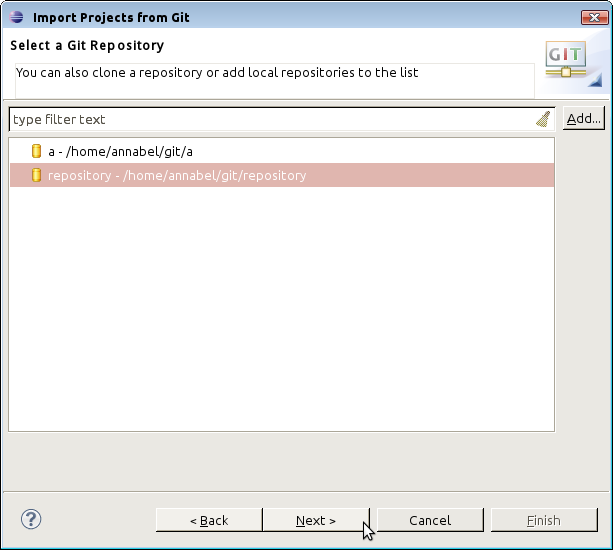
➎ File > Import > Git > Projects from Git > Next >  Local >選擇指定Git Repository


➏ Import as general project > Finish


➐ 可以開始改code

  ➀ Repository上滑鼠按右鍵 > Team > Push

  ➁ Repository上滑鼠按右鍵 > Team > Commit

  ➂ 設定個人顯示資訊

  ➃ 勾選要上傳的檔案&輸入commit訊息


♚ 往後必須以終端機輸入指令~/.dropbox-dist/dropboxd 才算開啟Dropbox進行同步, 按Ctrl+C或關閉終端機, 都算把Dropbox的同步程式關掉喔

2014年2月11日 星期二

【GIT】在 Windows 安裝 Git 工具


1. Git for Windows http://msysgit.github.com/

這是一個可以在 命令提示字元 (Command Prompt) 下執行的一套指令列工具

以下是安裝過程:

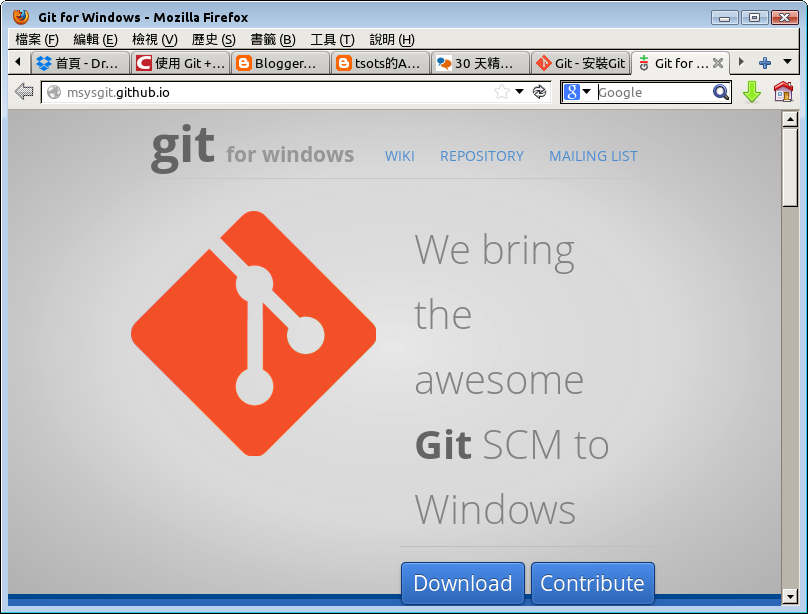
* 先連到 http://msysgit.github.com/官網,準備下載安裝檔


* 下載最新版


* 直接點擊下載的檔案進行安裝


* 安裝程式歡迎頁面


* 同意 GPL 授權條款


* 選擇安裝路徑


* 選取元件,保留預設選項即可


* 設定程式集名稱,保留預設選項即可


* 這裡請選擇第二項:Run Git from the Windows Command Prompt


* 換行字元轉換,建議保留預設選項即可。


* 開始進行安裝


* 安裝完成


* 安裝完成後,直接開啟命令提示字元,就可以開始使用


* 命令提示字要關閉重開, 再輸入 git --version 指令查詢目前工具程式的版本


2013年12月15日 星期日

【GIT】Version Control 基本功能簡介/教學

Git 是一個跨平台的分散式版本控制系統。

Git特色

  1. 高性能。
  2. 強大用戶端儲存管理。Git允許從本地端資料庫將舊有的版本改動刪除。
  3. 合併時支援無限數量的父階層版本改動。
  4. 支持分支整合(Rebasing)。
  5. 處理檔案快照(snapshot),而非檔案差異。
  6. 使用SHA-1 hash作為數據的唯一標示和索引。
  7. 所有受控的文件都有三種狀態: 已修改(modified)、 已暫存(staged)和已提交(committed)。對應文件在不同的區域:工作目錄(working directory)、暫存區(staging area)和文件庫(git repository)。

$git clone ssh://server account@server IP Address/Path/projectName.git
紅字表示固定字
灰色表示替換字

$git config --global user.name "name"
$git confog --global user.email "email"
紅字表示固定字
灰色表示替換字
【git pull】把檔案從Git repository加進現在的分支
【git add 檔名】把檔案加進Git的staging area
【git rm 檔名】把檔從Git移除
【git commit】提交在staging area的檔案 
【git push】把提交了的檔案推到目標的Git repository


【git log】檢視更改記錄
【git reset】回復變更
(1)git pull後→(2)modify後→(3)commit後
   回復到(3)
    $git reset --soft
  回復到(2)
    $git reset --mixed
  回復到(1)
    $git reset --hard

【git branch 名稱】建立分支
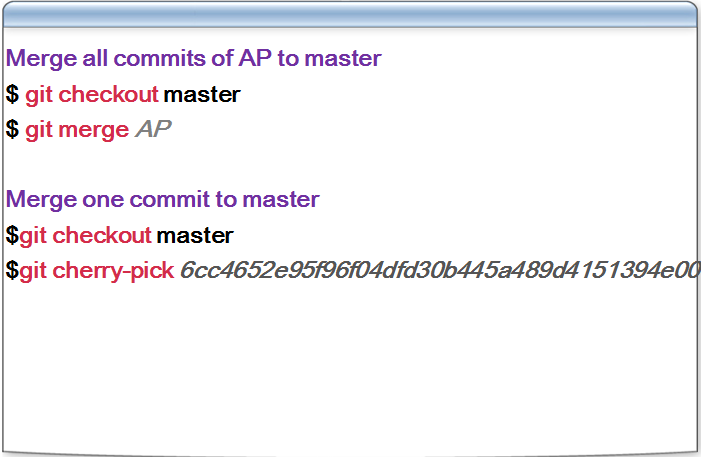
【git checkout 名稱】切換到分支

【git merge 名稱】合併分支到當前分支


【在server建立branch】
  新增一個名為newbranch的branch在server上
    $git push origin origin:refs/heads/newbranch
  檢視server上所有branch
    $git branch -r

【在server刪除branch】
  刪除一個名為newbranch的branch在server上
    $git push origin :heads/newbranch
  檢視server上所有branch
    $git branch -r 

【在server建立tag】
  新增一個名為newtag的tag
    $git tag -a newbranch
  檢視所有tag
    $git tag -l
  將所有tag push到server上
    $git push origin --tag

【刪除tag】
  刪除一個名為newtag的tag
    $git tag -d newtag

【在server刪除tag】
  刪除一個名為newtag的tag在server上
    $git push origin :refs/tags/newtag